Traffic destination and distribution
THIS ARTICLE IS NOT UPDATED. WE ARE ON THE INTERCOM NOW!
http://help-center.peerclick.com/en
JOIN US THERE AND WATCH ALL UPDATED PEERCLICK GUIDES!

1. Path
Receiving traffic from a campaign URL, tracker distributes it as follows:
- Firstly it checks if the click corresponds to any of the rules. If there is a match, then click is sent according to this corresponding rule.
- If there is no rule match, then the click is directed to one of the paths according to the traffic distribution proportions between paths.
- Tracker defines the landing page where traffic is sent within the selected path, or sends traffic directly to the offer, based on the settings.
Lander + Offer
The simplest configuration of one lander and one offer looks like this:
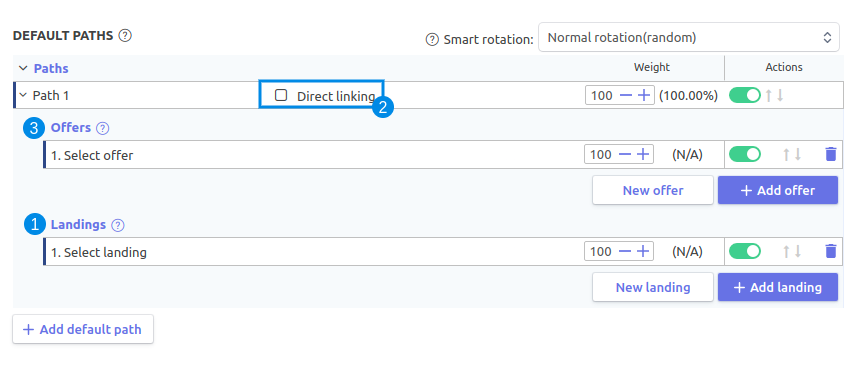
1. Choosing Lander
To select a lander, click the + New Lander button. The window of lander selection will open. Thanks to grouping and search, you can find the necessary one quickly.
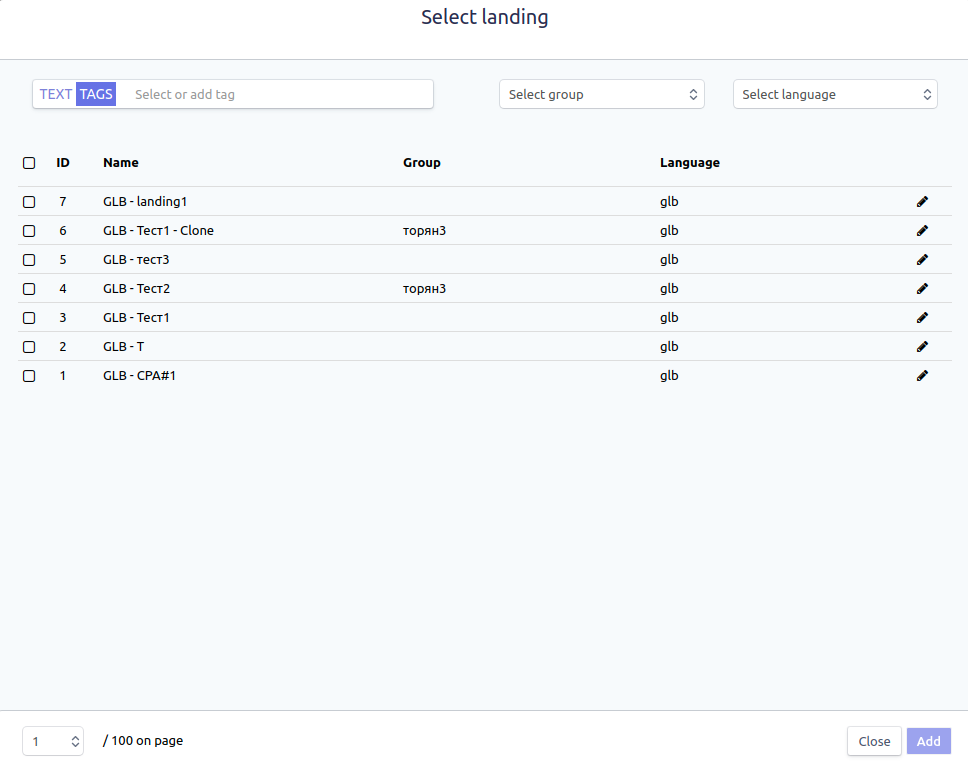
After choosing the lander, it will appear inside the path. To add another lander, click the same button again. You can also select several landers, all of them will be added to the path.
You can create a new lander as well. To do this, click + New lander button. A standard window for a lander creation will open. After saving, the lander will appear on the list of landers, which opens with the + Add Landing button.
2. To send traffic directly without lander, check the Direct linking. You can use it for any path or rule, even when you have several landers.
3. Choosing Offer
To select an offer, click + Add offer. An offer selection window will open.
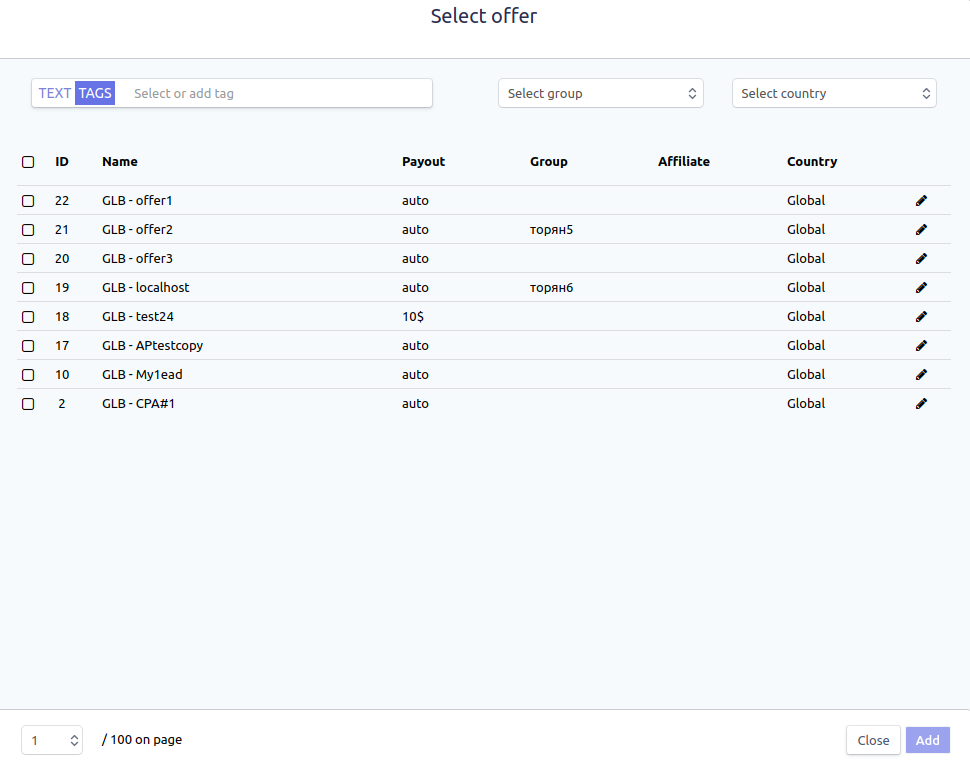
You can also create a new offer. To do this, click the New offer button. A standard window for offer creation will open. After saving, the offer will appear in the list of offers.You can open it clicking the + Add offer button
A / B testing
Add a few landers and offers to your path.
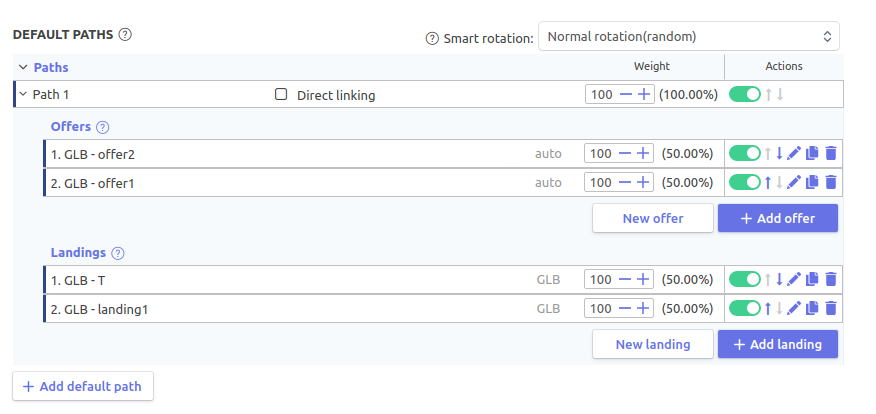
Traffic will be randomly distributed between the landers according to the weight of every lander. For example, on the screenshot above, the landers have the same weight. It means that the traffic will be distributed equally.

On the screenshot above, the first offer has a weight of 2, and the second one has a weight of 8. It means that the second offer will receive four times as much traffic as the first one.
The numerical value of the weight that you enter is automatically converted to a percentage for your convenience.
To add a path, click the + Add default path button.
Editing

To stop sending traffic to a lander / path / offer or to turn off one of the rule criteria, click on the slider (icon 1). To resume traffic, click on the slider again.
To move a path / lander / offer within the list, click on the icon 2.
To edit a path / lander / offer, click on the icon 3. You can also change the names of paths and rules clicking on it.
To copy paths / landers / offers, click on the icon 4. The copy will appear as - Clone at the end of the list.
To remove a path / lander / offer from the distribution, click on the icon 5.
2. Flow
If you run many campaigns with the same conversion funnel, then you can use the flow system. Create a flow and set it for many campaigns. So the traffic distribution settings for one flow will
Receiving traffic from a campaign URL, tracker distributes it as follows:
- It checks if a click matches one of the flows. If so, it sends it to the appropriate flow.
- Follows points 1-3 of traffic distribution to the path.
If you select Flow from the Destination section, the flow selection field appears on the right side. As shown on the screen:

In the drop-down menu, select the necessary flow.
If you want to transfer the flow settings to the path settings for the specific campaign, select the desired flow from the drop-down menu and click the Convert to path button. The flow editing window will change to the path editing window with the configuration data transferred from the flow. In the Destination section Flow will shift to Path.
3. URL
Sometimes it is necessary to send traffic to a direct link without using an offer. To do this, select Url from the Destination section. In the field which appears on the right, enter the desired URL.
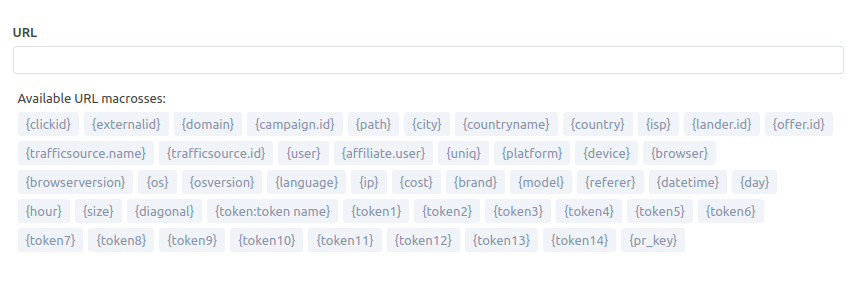
You can add macros for tracking to your link. Do it the same way as you've done setting your lander / offer up.
4. Web-site Protection
Read more about Web-site Protection here.
Receiving traffic from campaign URL, tracker distributes it as follows: :
- It checks if the click meets the standard bot compliance rules.
- Then it checks if the click matches custom rules.
- If the Without redirect option is selected, the content will be shown according to (bot / not bot) identification.
- If you select To rule setting, tracker will follow steps 1-3 for traffic distribution to path. If the click is not identified as a bot.
- If you select To url setting, traffic will be redirected to the specified Url. Provided that the click is not identified as a bot.
If you set additional blacklist rules, read more about rules settings.
Updated over 5 years ago
